Easy Overnight High-Hydration Sourdough Bread
No Stretch & Folds
This is a very wet, high-hydration sourdough loaf that skips the usual stretch-and-fold schedule. The dough gets only 2–3 minutes of slap-and-folds, ferments overnight on the counter, then is shaped and baked in a Dutch oven the next morning. About 12 hours worked in my approximately 69°F kitchen, so watch the dough—not just the clock.
The Tested Formula
- Makes: 1 loaf
- Approximate overall hydration: 88.5%
- Tested room temperature: about 69°F
The starter used here is 100% hydration, meaning it contains equal weights of starter flour and water.
Ingredients
- 70 g active 100% hydration sourdough starter
- 350 g lukewarm bottled water
- 200 g all-purpose flour
- 200 g bread flour
- 7 g salt
Instructions
1. Mix the Dough
Stir the active sourdough starter into the lukewarm bottled water. Add the all-purpose flour, bread flour, and salt. Mix until there are no large patches of dry flour remaining.
The dough will look very wet, sticky, and loose. This is expected. Do not add extra flour just to make the dough feel like a traditional stiff bread dough.
2. Slap and Fold
Turn the dough onto the work surface and slap and fold for about 2–3 minutes. The goal is simply to build some initial structure and make the dough a little smoother and more cohesive.
Do not add stretch-and-folds later. This tested loaf did not use stretch-and-folds.
3. Overnight Bulk Ferment
Place the dough into a covered bowl and leave it at room temperature. My tested loaf fermented for approximately 12 hours in a 69°F house.
By morning, the dough should look noticeably fermented, relaxed, expanded, and bubbly. Twelve hours is the tested time at approximately 69°F, not a universal rule. A warmer room may ferment faster.
4. Preheat the Dutch Oven
The next morning, place the Dutch oven in the oven and preheat at 450°F for 1 hour.
5. Shape
Turn the fermented dough out and gently shape it into a round loaf. Because this is a very high-hydration dough, handle it gently and deliberately rather than kneading a lot of extra flour into it. Place the shaped dough onto a bread sling.
6. Score
Score the loaf before baking. The main score should open clearly during baking.
7. Add Steam
Transfer the loaf and bread sling into the fully preheated Dutch oven. Add ice inside the Dutch oven underneath the sling, exactly as I did in this tested loaf. Cover immediately with the lid.
8. Covered Bake
Bake at 450°F for 25 minutes with the lid on.
9. Uncovered Bake
Remove the lid. Reduce the oven temperature to 425°F and bake for 25 more minutes uncovered. The total tested bake time is 50 minutes.
10. Cool
Remove the loaf from the Dutch oven and cool on a rack before slicing.
Actual Timeline
Evening
- Mix dough.
- Slap and fold for 2–3 minutes.
- Cover and leave on the counter.
Overnight
- Bulk ferment for about 12 hours at approximately 69°F.
Morning
- Preheat the Dutch oven for 1 hour at 450°F.
- Shape.
- Score.
- Transfer to the Dutch oven with the sling.
- Add ice under the sling.
- Bake 25 minutes covered at 450°F.
- Remove the lid and reduce the oven to 425°F.
- Bake another 25 minutes.
- Cool before slicing.
Don’t Mess This Up
- The dough is supposed to be wet. This is a very high-hydration dough. Do not dump in extra flour just because it feels sticky.
- Do not add stretch-and-folds. This tested loaf used only 2–3 minutes of slap-and-folds.
- Watch the fermentation, not just the clock. About 12 hours worked in a roughly 69°F kitchen. Warmer kitchens may move faster.
- Preheat the Dutch oven fully. My Dutch oven preheated for a full hour at 450°F.
- The ice goes inside the Dutch oven underneath the sling.
- Reduce the temperature after removing the lid. The covered bake is at 450°F; the uncovered bake is at 425°F.
- Cool before slicing. Do not cut the loaf immediately after baking.
What It Should Look Like
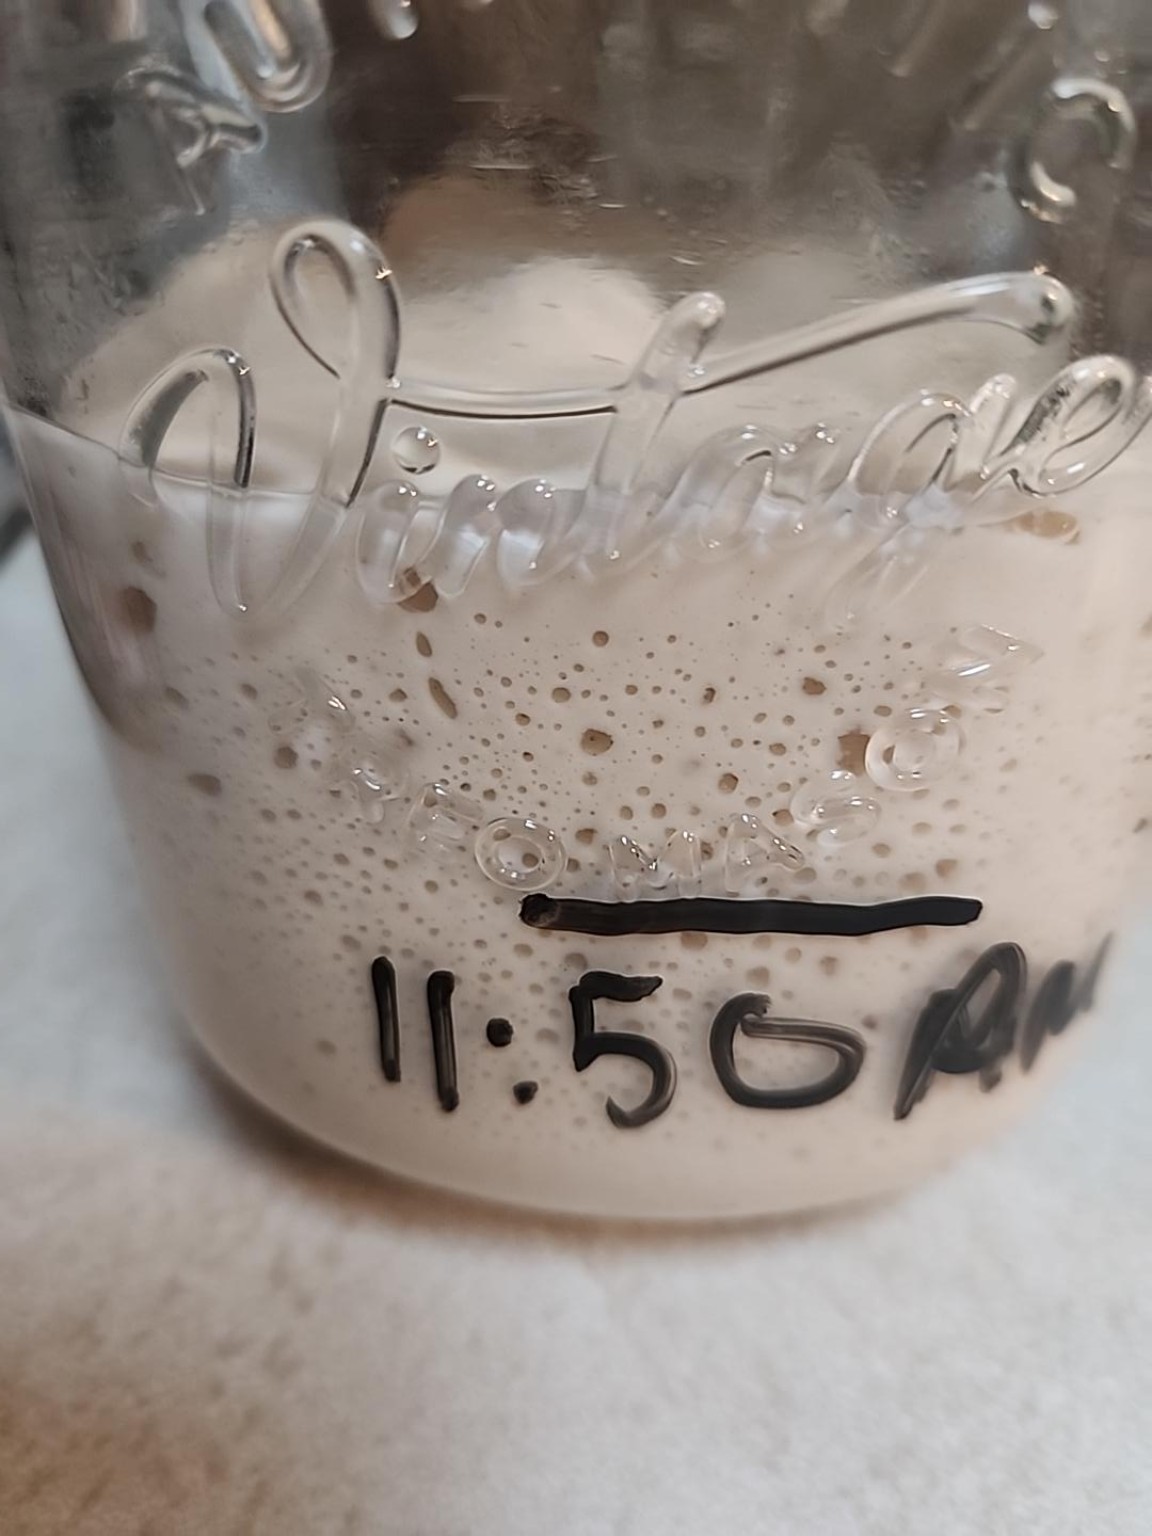
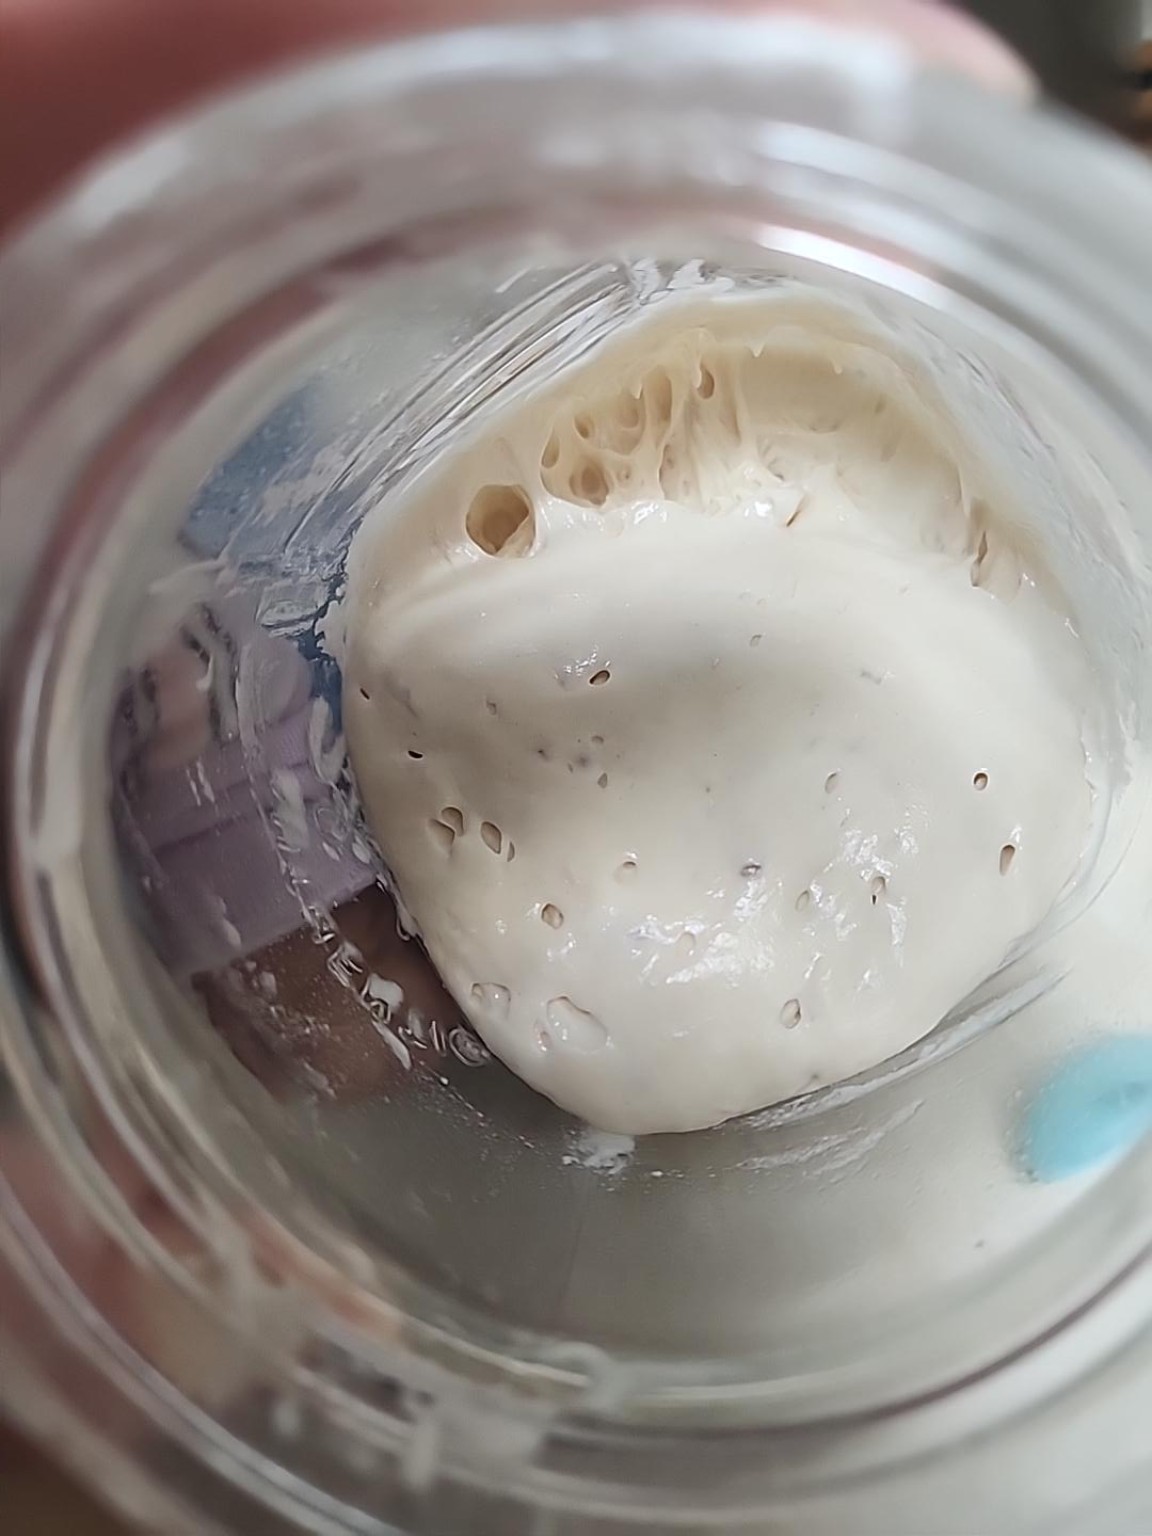
Active Starter
Before mixing, the 100% hydration starter should be active and visibly bubbly.
After Mixing
The dough should look wet, sticky, and loose. That is the correct texture for this high-hydration formula.
After Fermentation
After the overnight ferment, the dough should look relaxed, airy, noticeably expanded, bubbly, and visibly fermented.
Shaped and Ready to Bake
The gently shaped dough should sit as a soft round on the bread sling. Handle it deliberately and avoid kneading in a lot of extra flour.
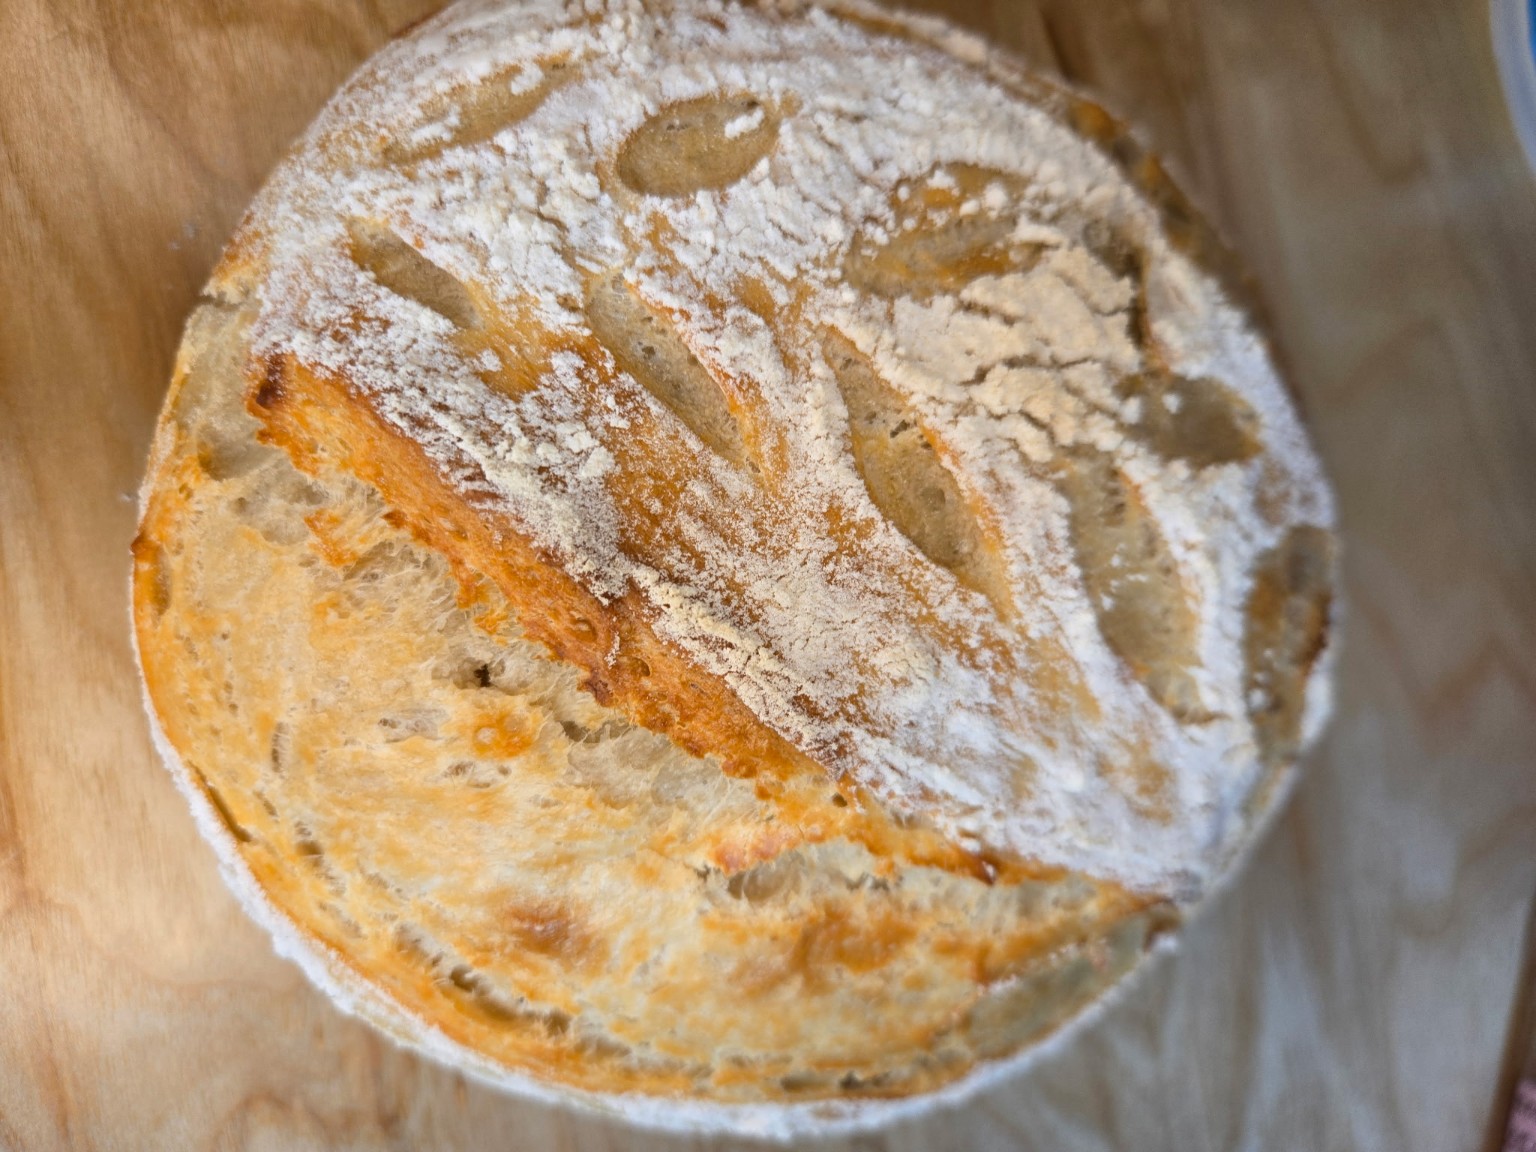
Finished Loaf
Crumb
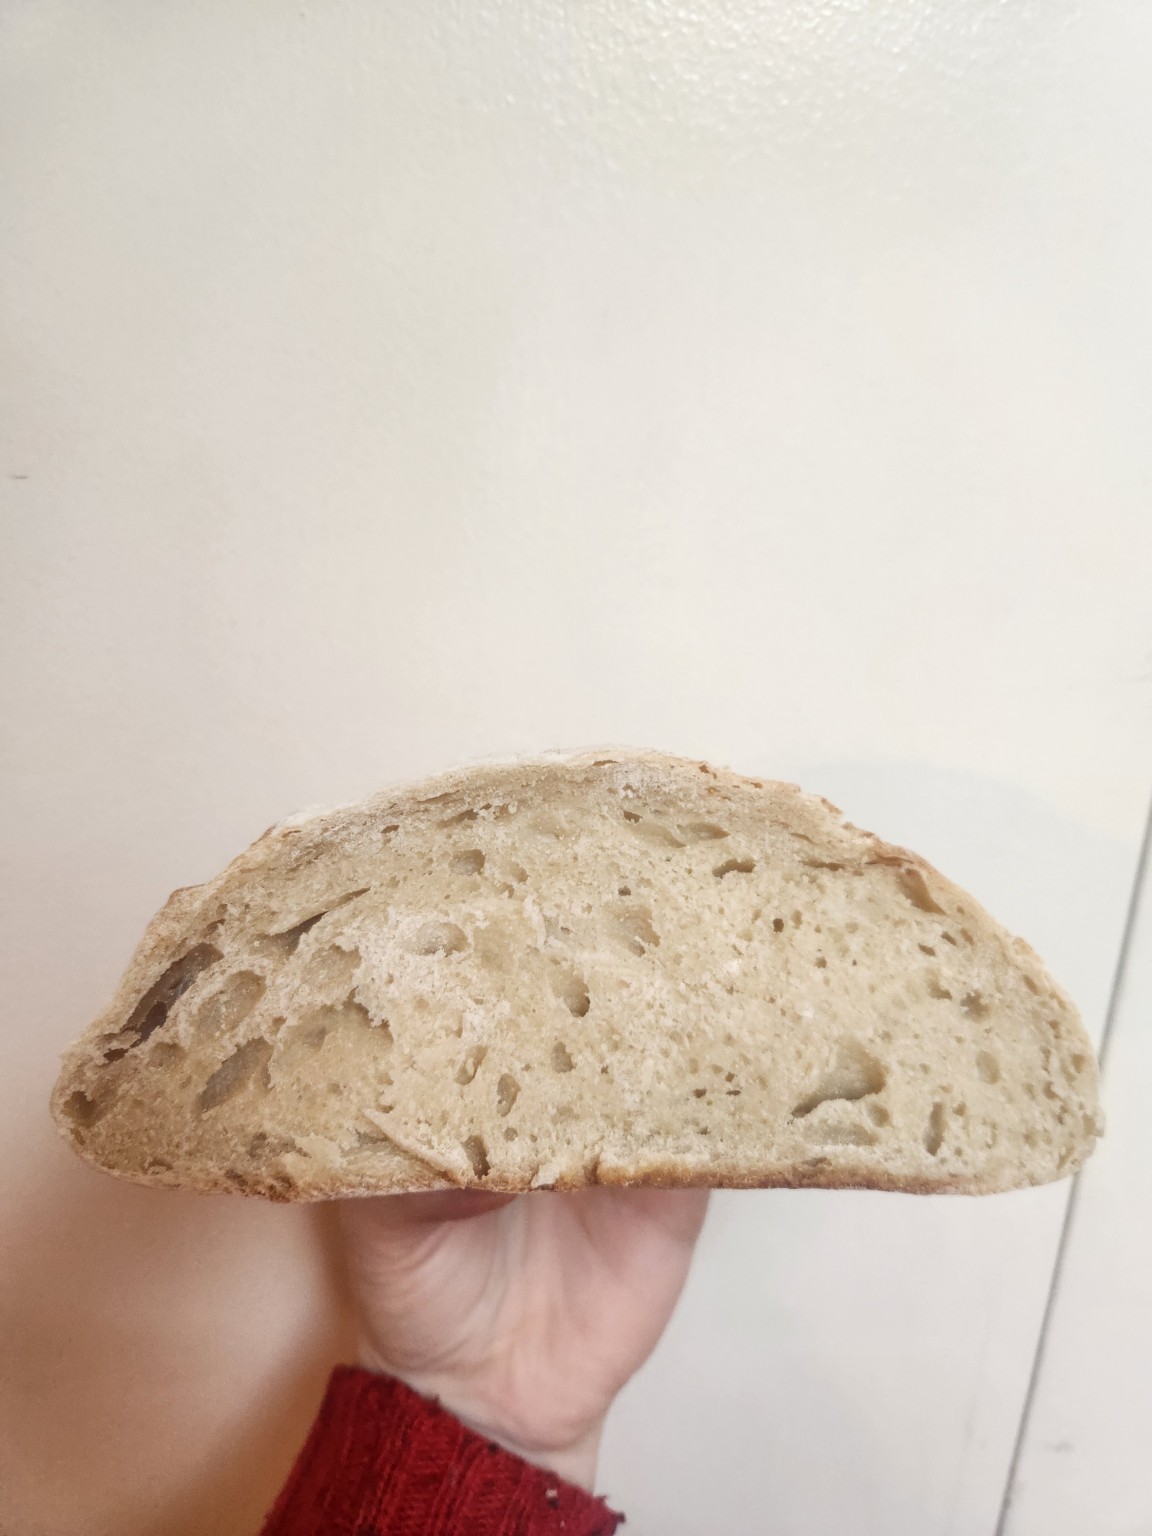
This is not an exaggerated “huge open crumb” loaf. The actual interior is soft and fairly even, with a few more open pockets throughout.
The Chaos Test
- Mixer needed? No.
- Stretch-and-fold schedule? No.
- Overnight ferment? Yes.
- Actual tested room temperature: about 69°F.
- Actual bake time: 50 minutes.
Easy Overnight High-Hydration Sourdough Bread
Course: Breads1
loaf50
minutesAbout 12 hours at approximately 69°F
450°F for 1 hour
25 minutes at 450°F
25 minutes at 425°F
A very wet, approximately 88.5% hydration sourdough loaf with only 2–3 minutes of slap-and-folds and no stretch-and-fold schedule. The tested overnight ferment was about 12 hours at approximately 69°F.
Ingredients
- Ingredients
70 g active 100% hydration sourdough starter
350 g lukewarm bottled water
200 g all-purpose flour
200 g bread flour
7 g salt
Directions
- Mix the Dough
- Stir the active sourdough starter into the lukewarm bottled water.
- Add the all-purpose flour, bread flour, and salt. Mix until there are no large patches of dry flour remaining. The dough will look very wet, sticky, and loose. This is expected. Do not add extra flour just to make it feel like a traditional stiff bread dough.
- Slap and Fold
- Turn the dough onto the work surface and slap and fold for about 2–3 minutes. The goal is simply to build some initial structure and make the dough a little smoother and more cohesive.
- Do not add stretch-and-folds later. This tested loaf did not use stretch-and-folds.
- Overnight Bulk Ferment
- Place the dough into a covered bowl and leave it at room temperature. My tested loaf fermented for approximately 12 hours in a 69°F house. By morning, the dough should look noticeably fermented, relaxed, expanded, and bubbly. Twelve hours is the tested time at approximately 69°F, not a universal rule. A warmer room may ferment faster.
- Preheat, Shape, and Score
- The next morning, place the Dutch oven in the oven and preheat at 450°F for 1 hour.
- Turn the fermented dough out and gently shape it into a round loaf. Because this is a very high-hydration dough, handle it gently and deliberately rather than kneading a lot of extra flour into it. Place the shaped dough onto a bread sling.
- Score the loaf before baking. The main score should open clearly during baking.
- Add Steam and Bake
- Transfer the loaf and bread sling into the fully preheated Dutch oven. Add ice inside the Dutch oven underneath the sling and cover immediately with the lid.
- Bake at 450°F for 25 minutes with the lid on.
- Remove the lid, reduce the oven temperature to 425°F, and bake for 25 more minutes uncovered. The total tested bake time is 50 minutes.
- Cool
- Remove the loaf from the Dutch oven and cool on a rack before slicing.